
Salesforce Quick Start Guide
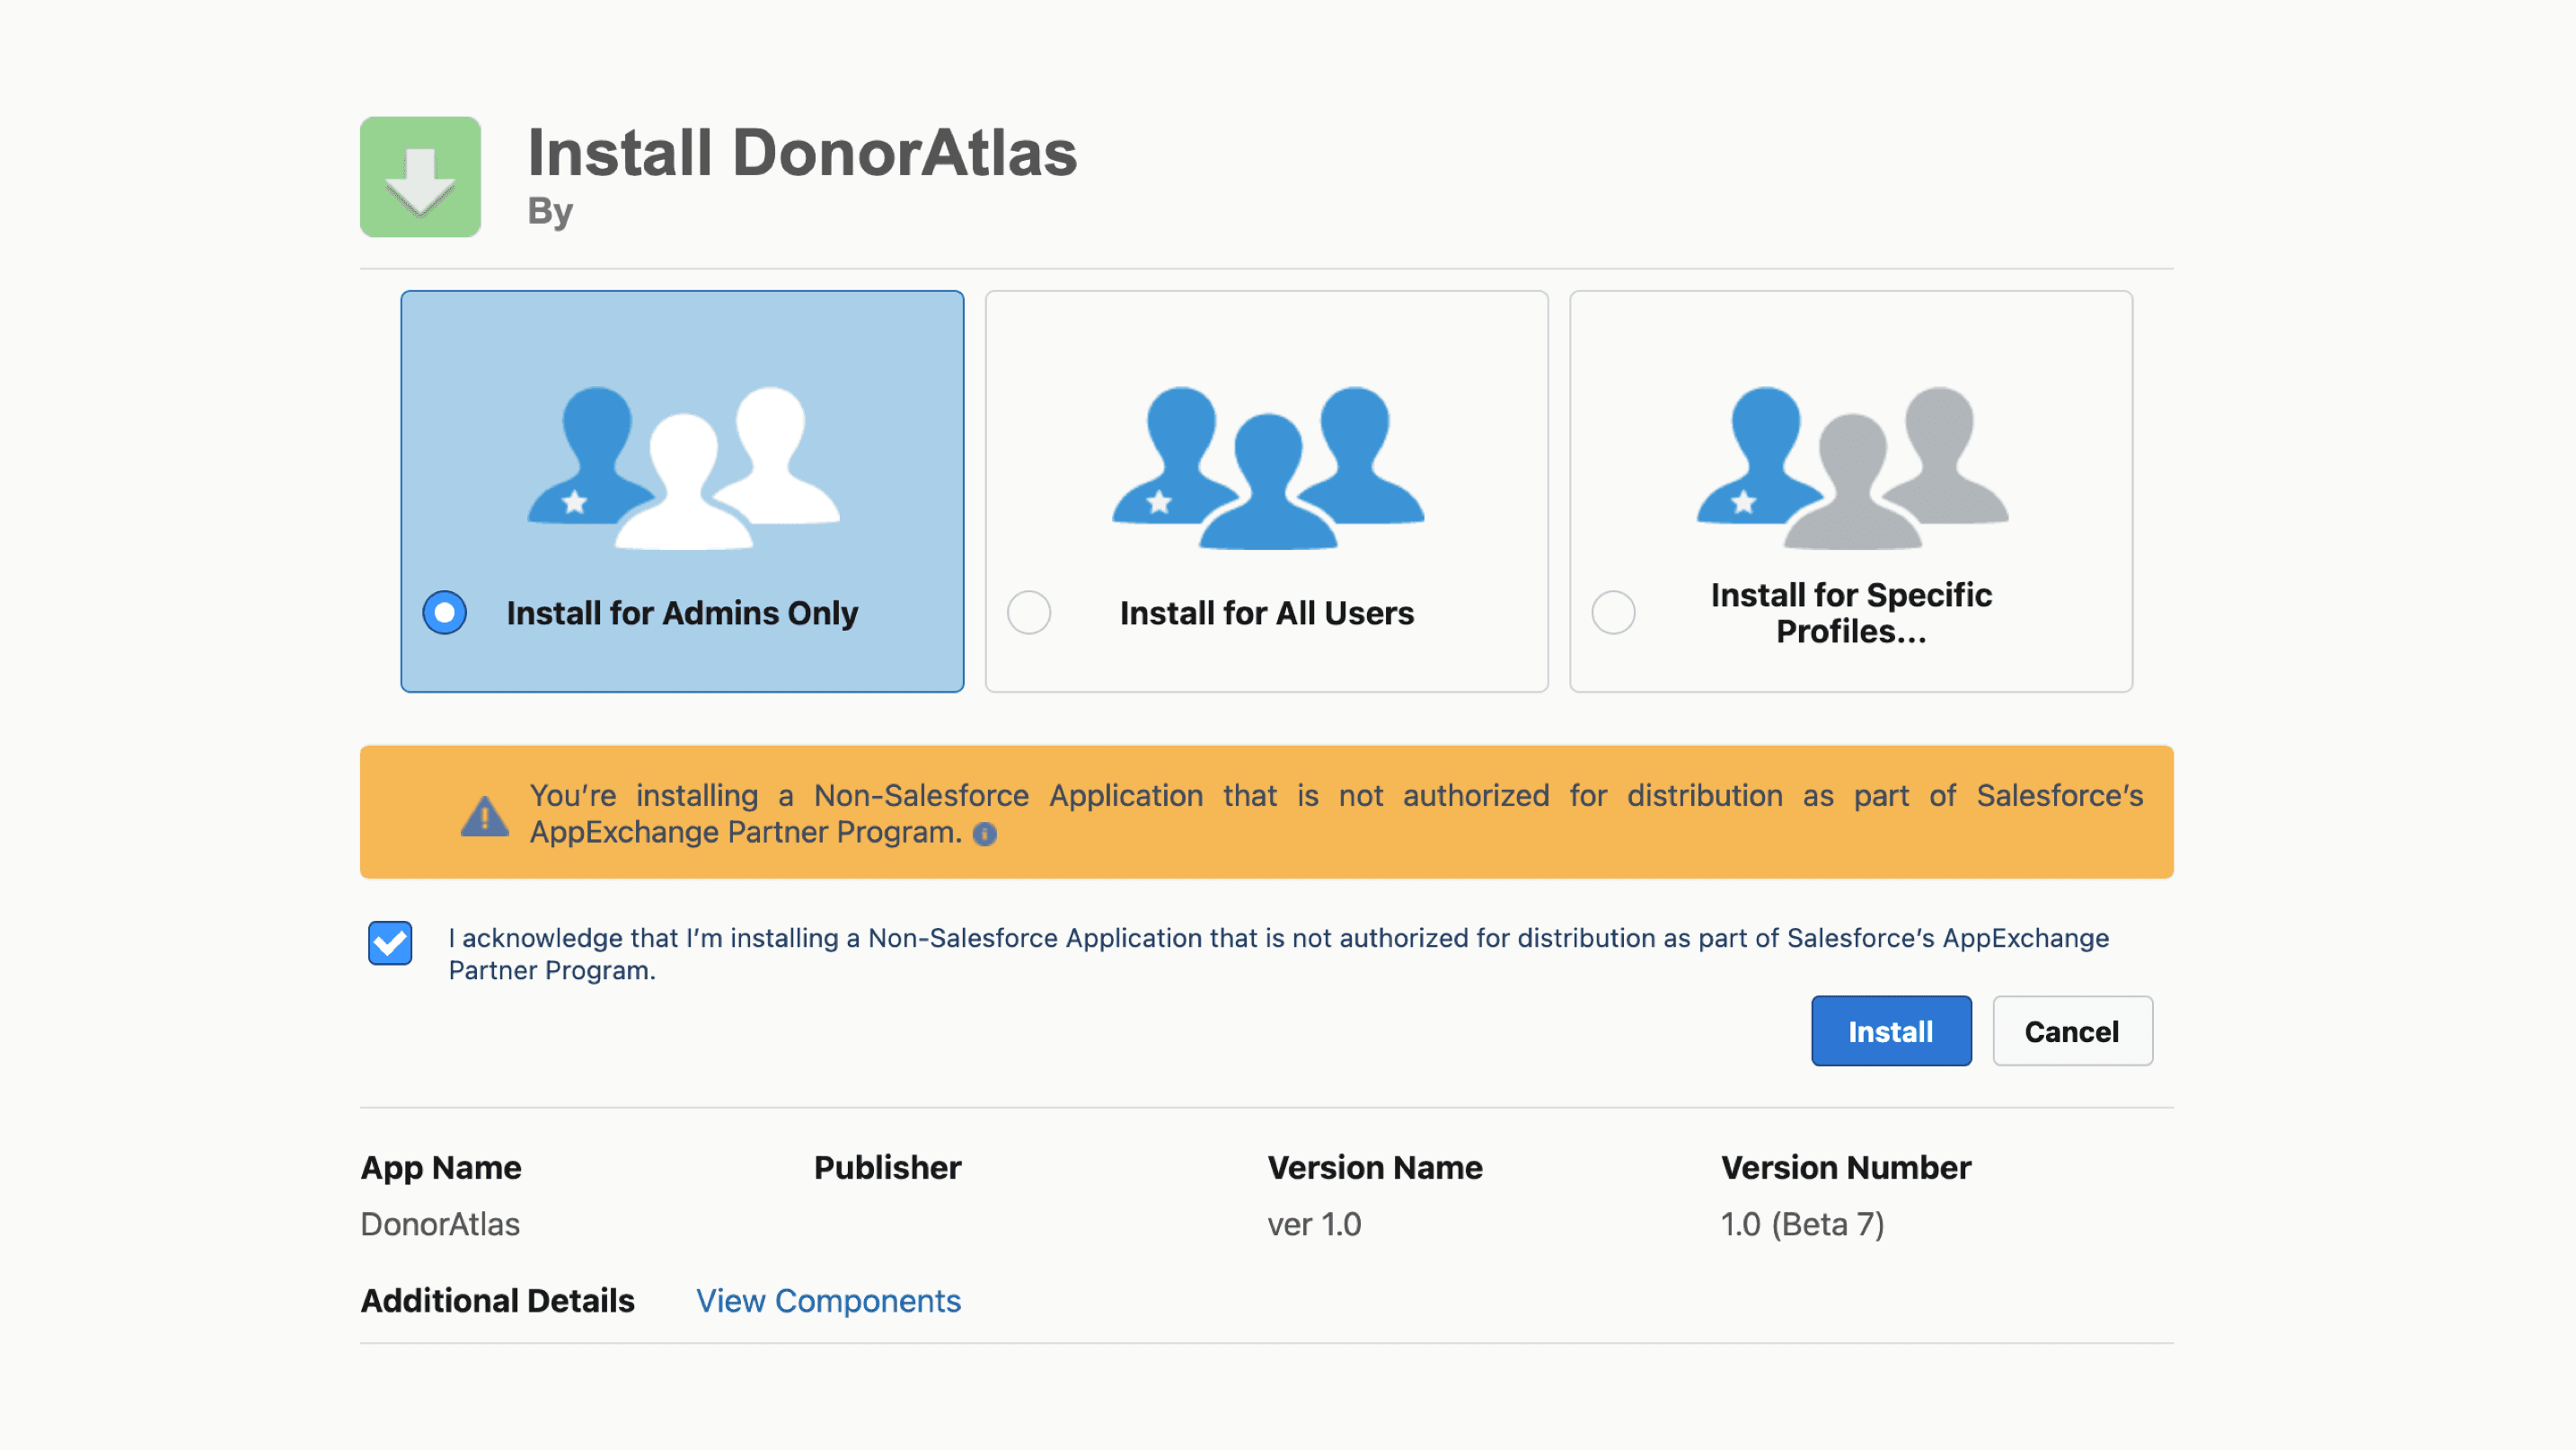
Install the Integration
Click here to install the DonorAtlas integration for Salesforce.
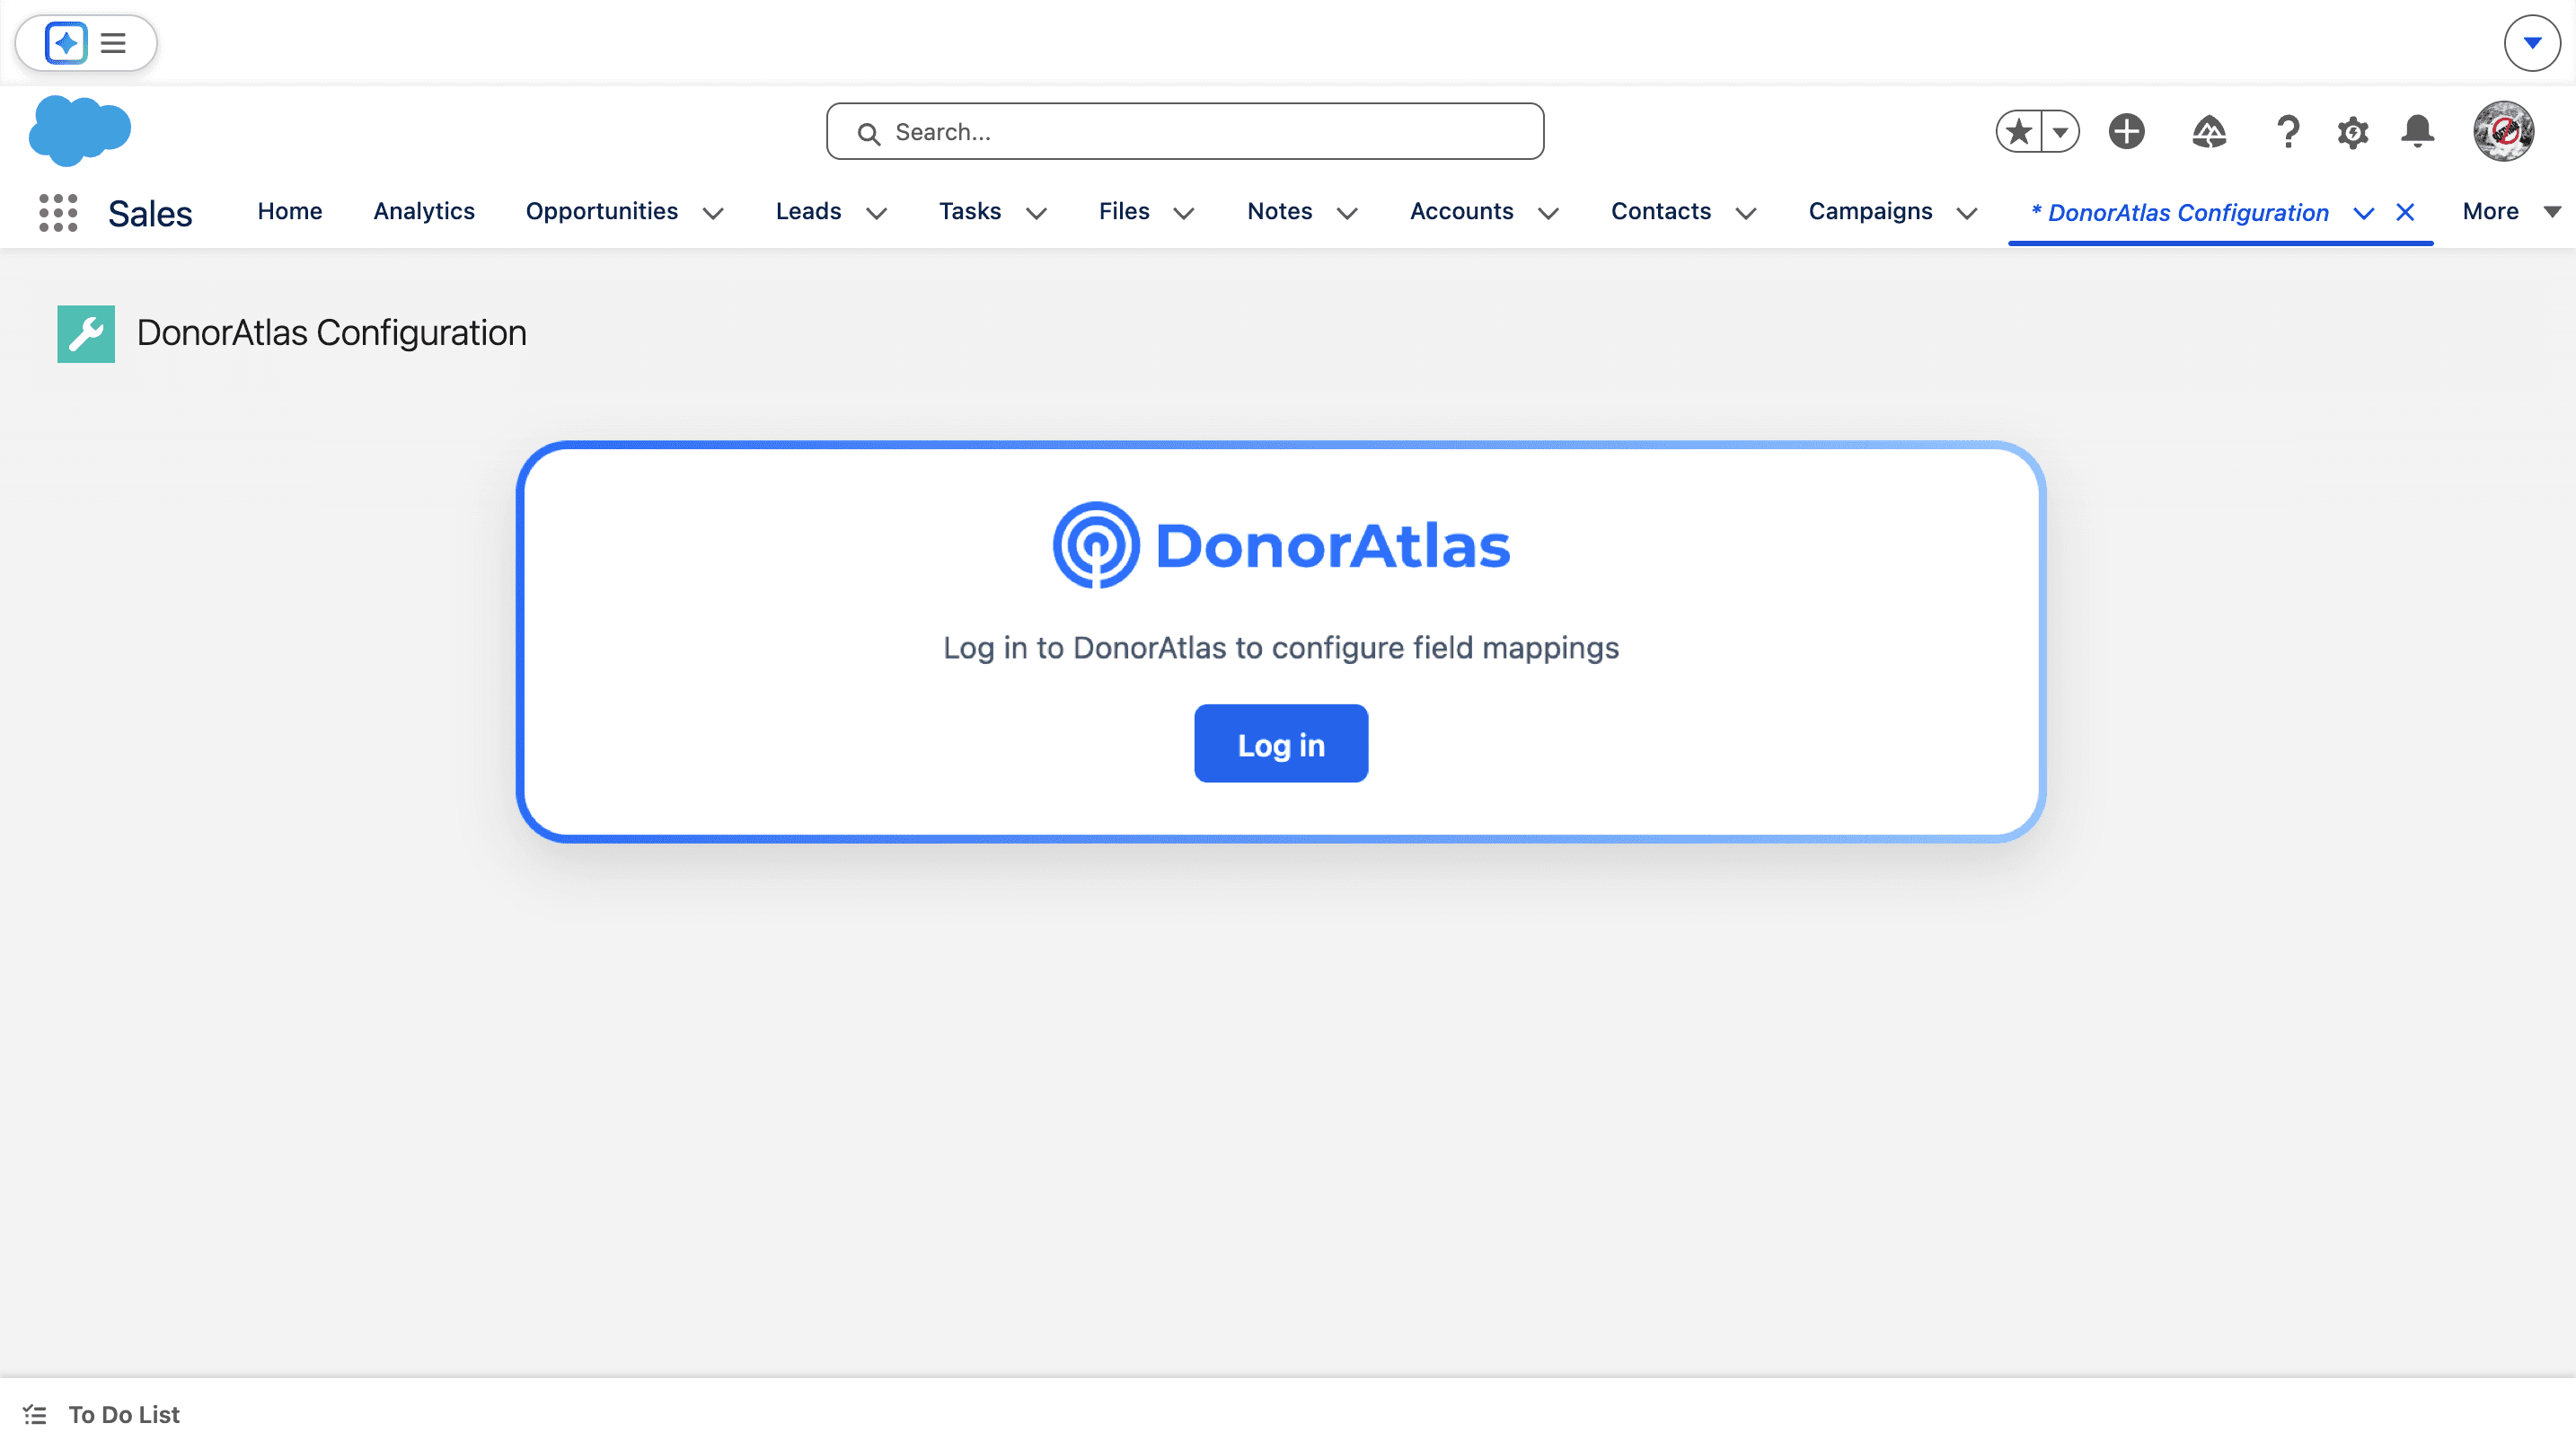
Log in to DonorAtlas
Go to the DonorAtlas Configuration page from the App Launcher. Press Log in to log in to DonorAtlas.
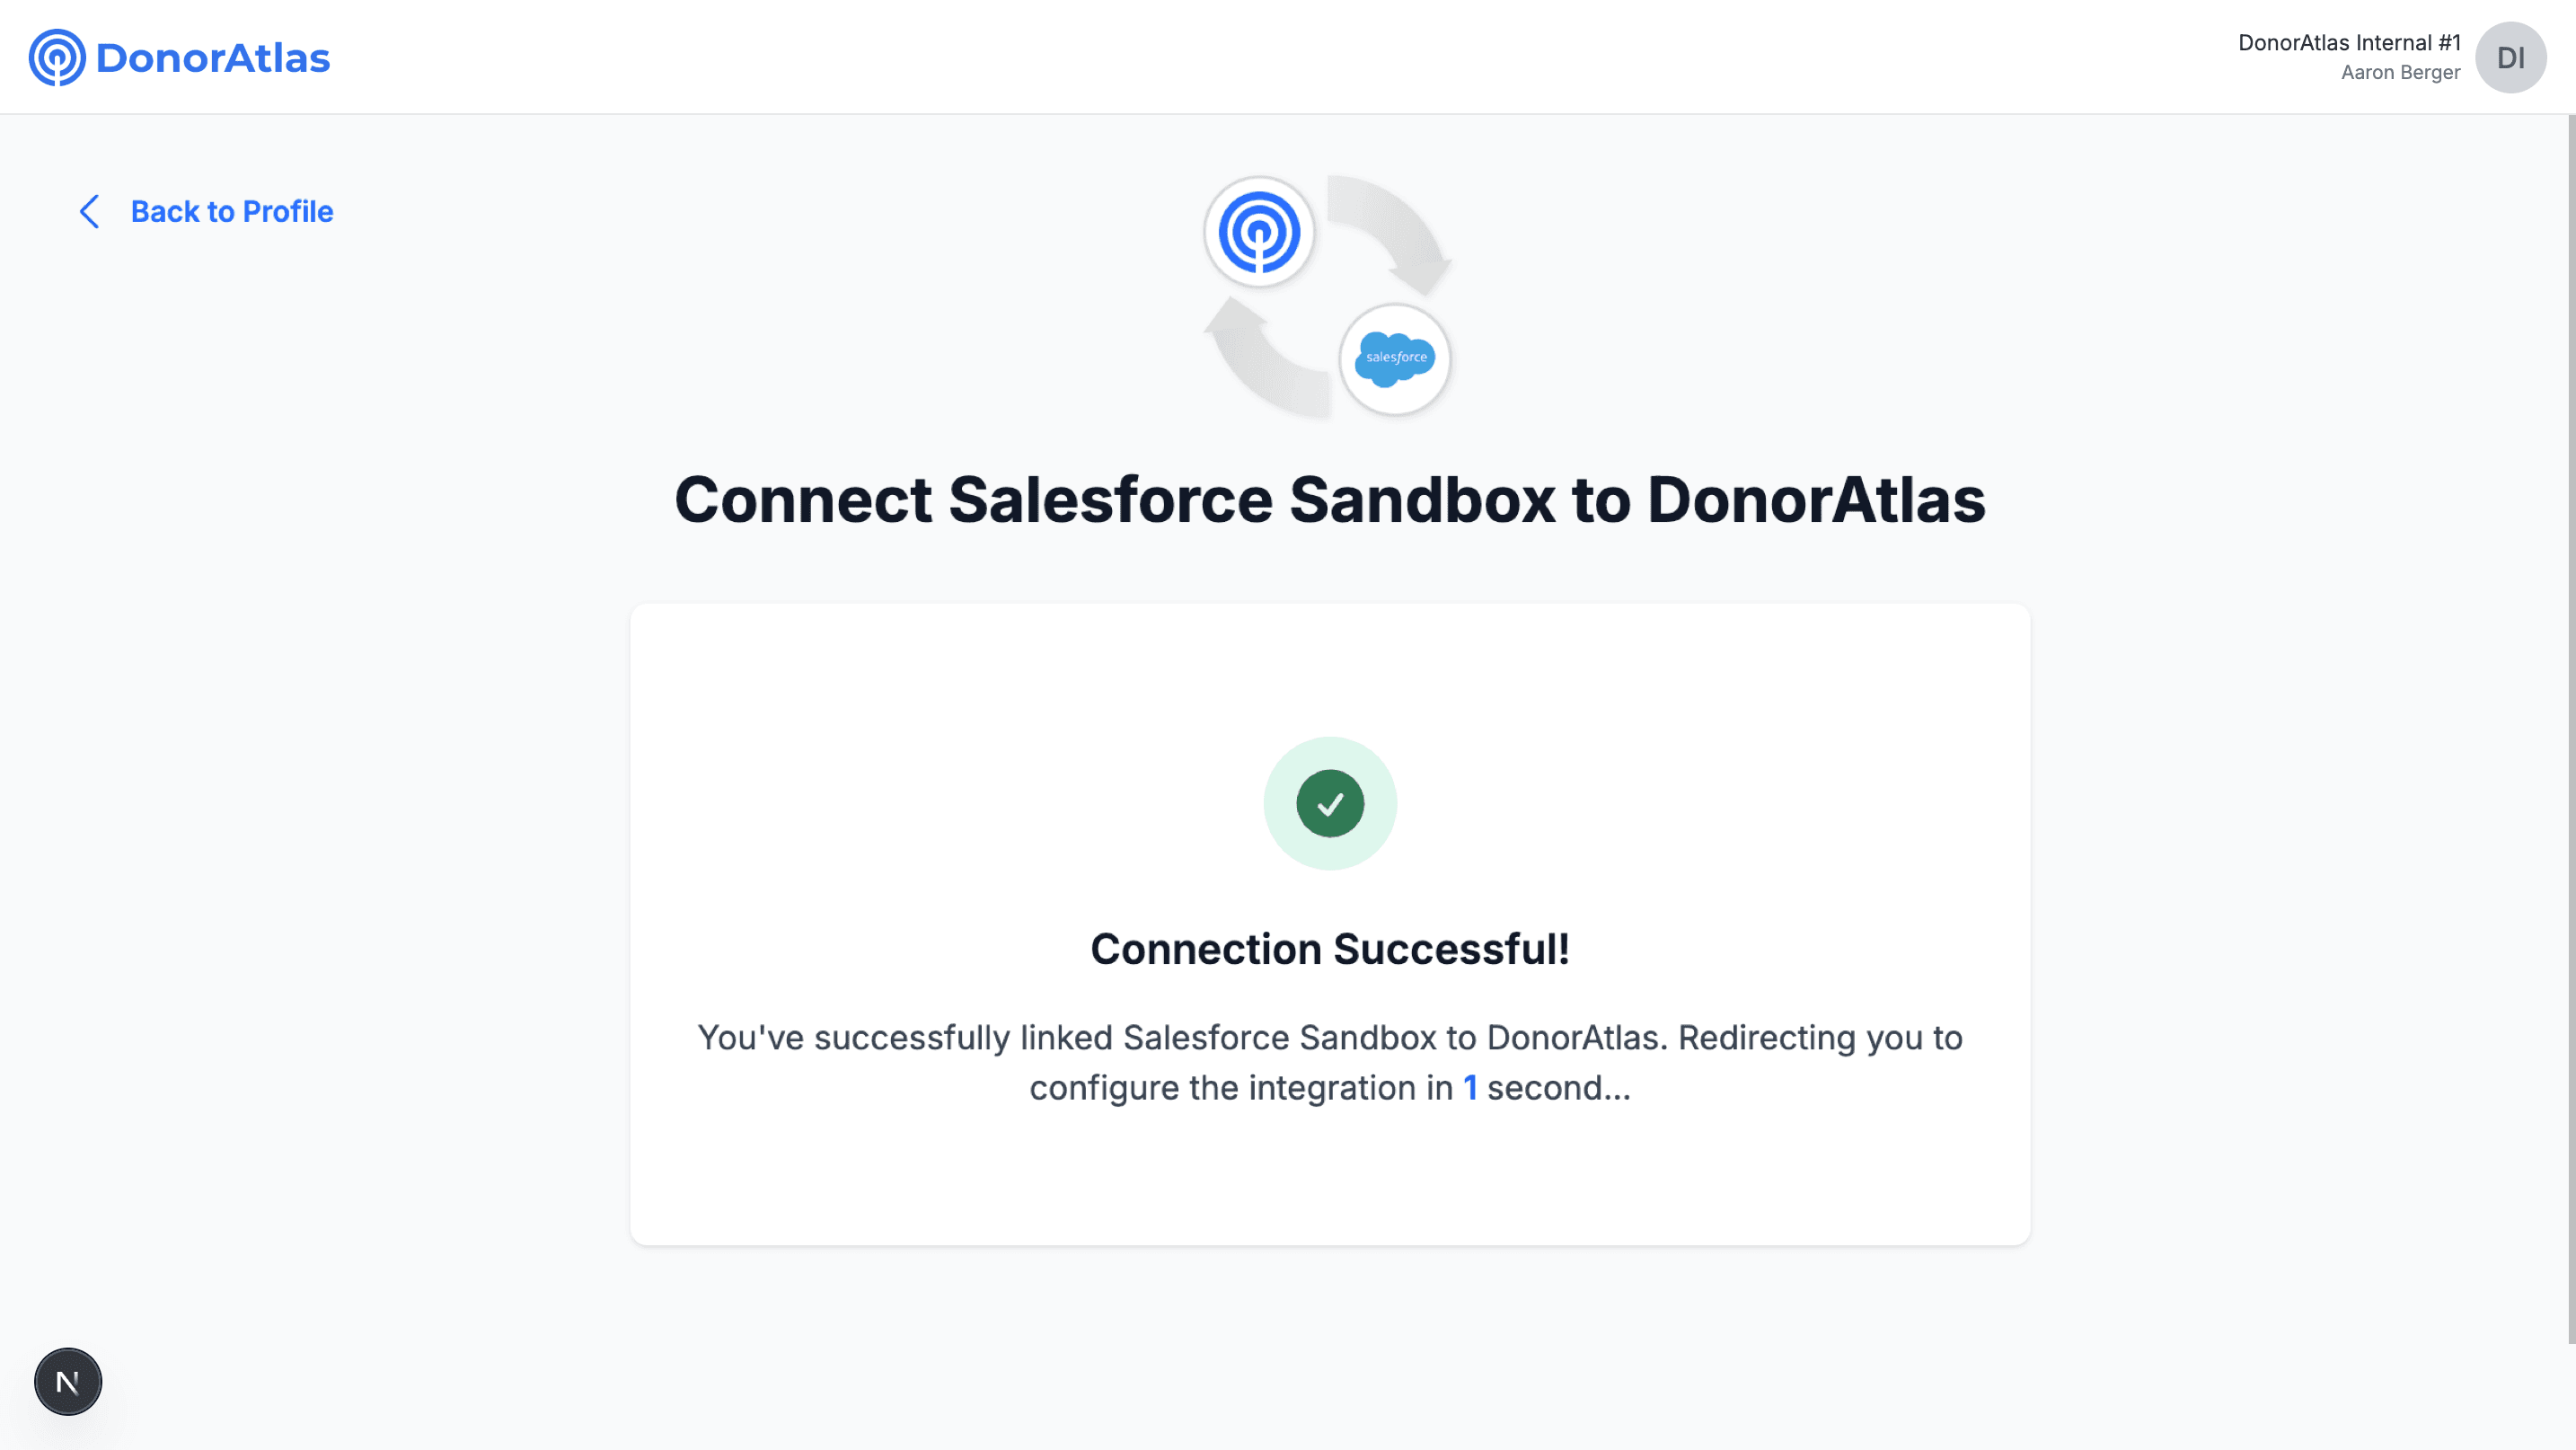
Connect Your Account
Log in to your DonorAtlas account, and click Allow when redirected back to Salesforce. Once you're finished, you'll see a Connection Successful! screen!
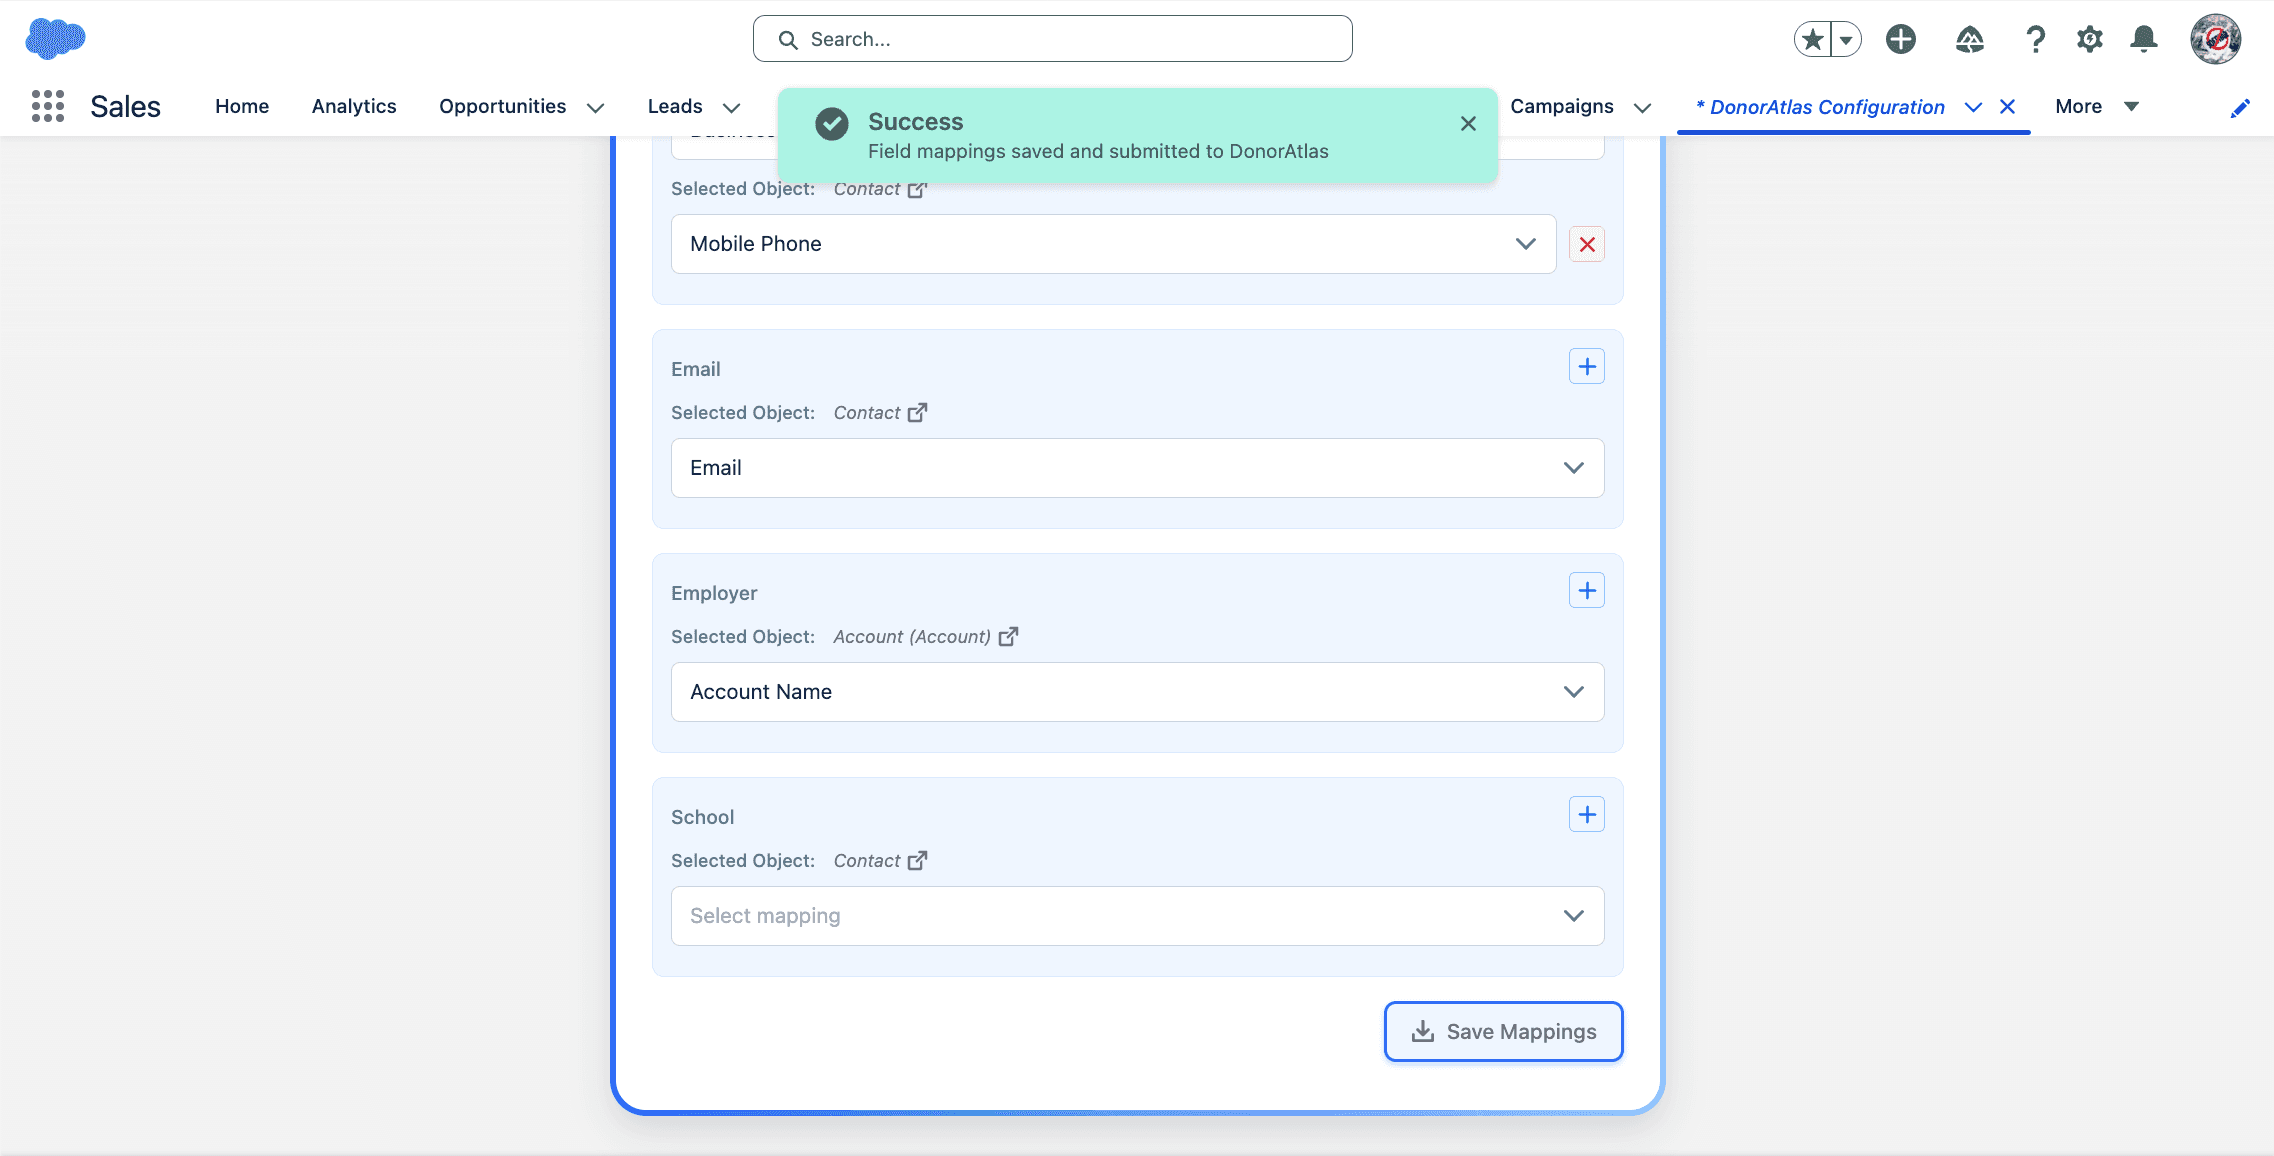
Configure Field Mappings
Go back to the DonorAtlas Configuration app in Salesforce and fill out the Contact, Lead, and Account field mappings. This tells DonorAtlas which Salesforce data to use to match to DonorAtlas donor profiles. Click Save Mappings at the bottom to save.
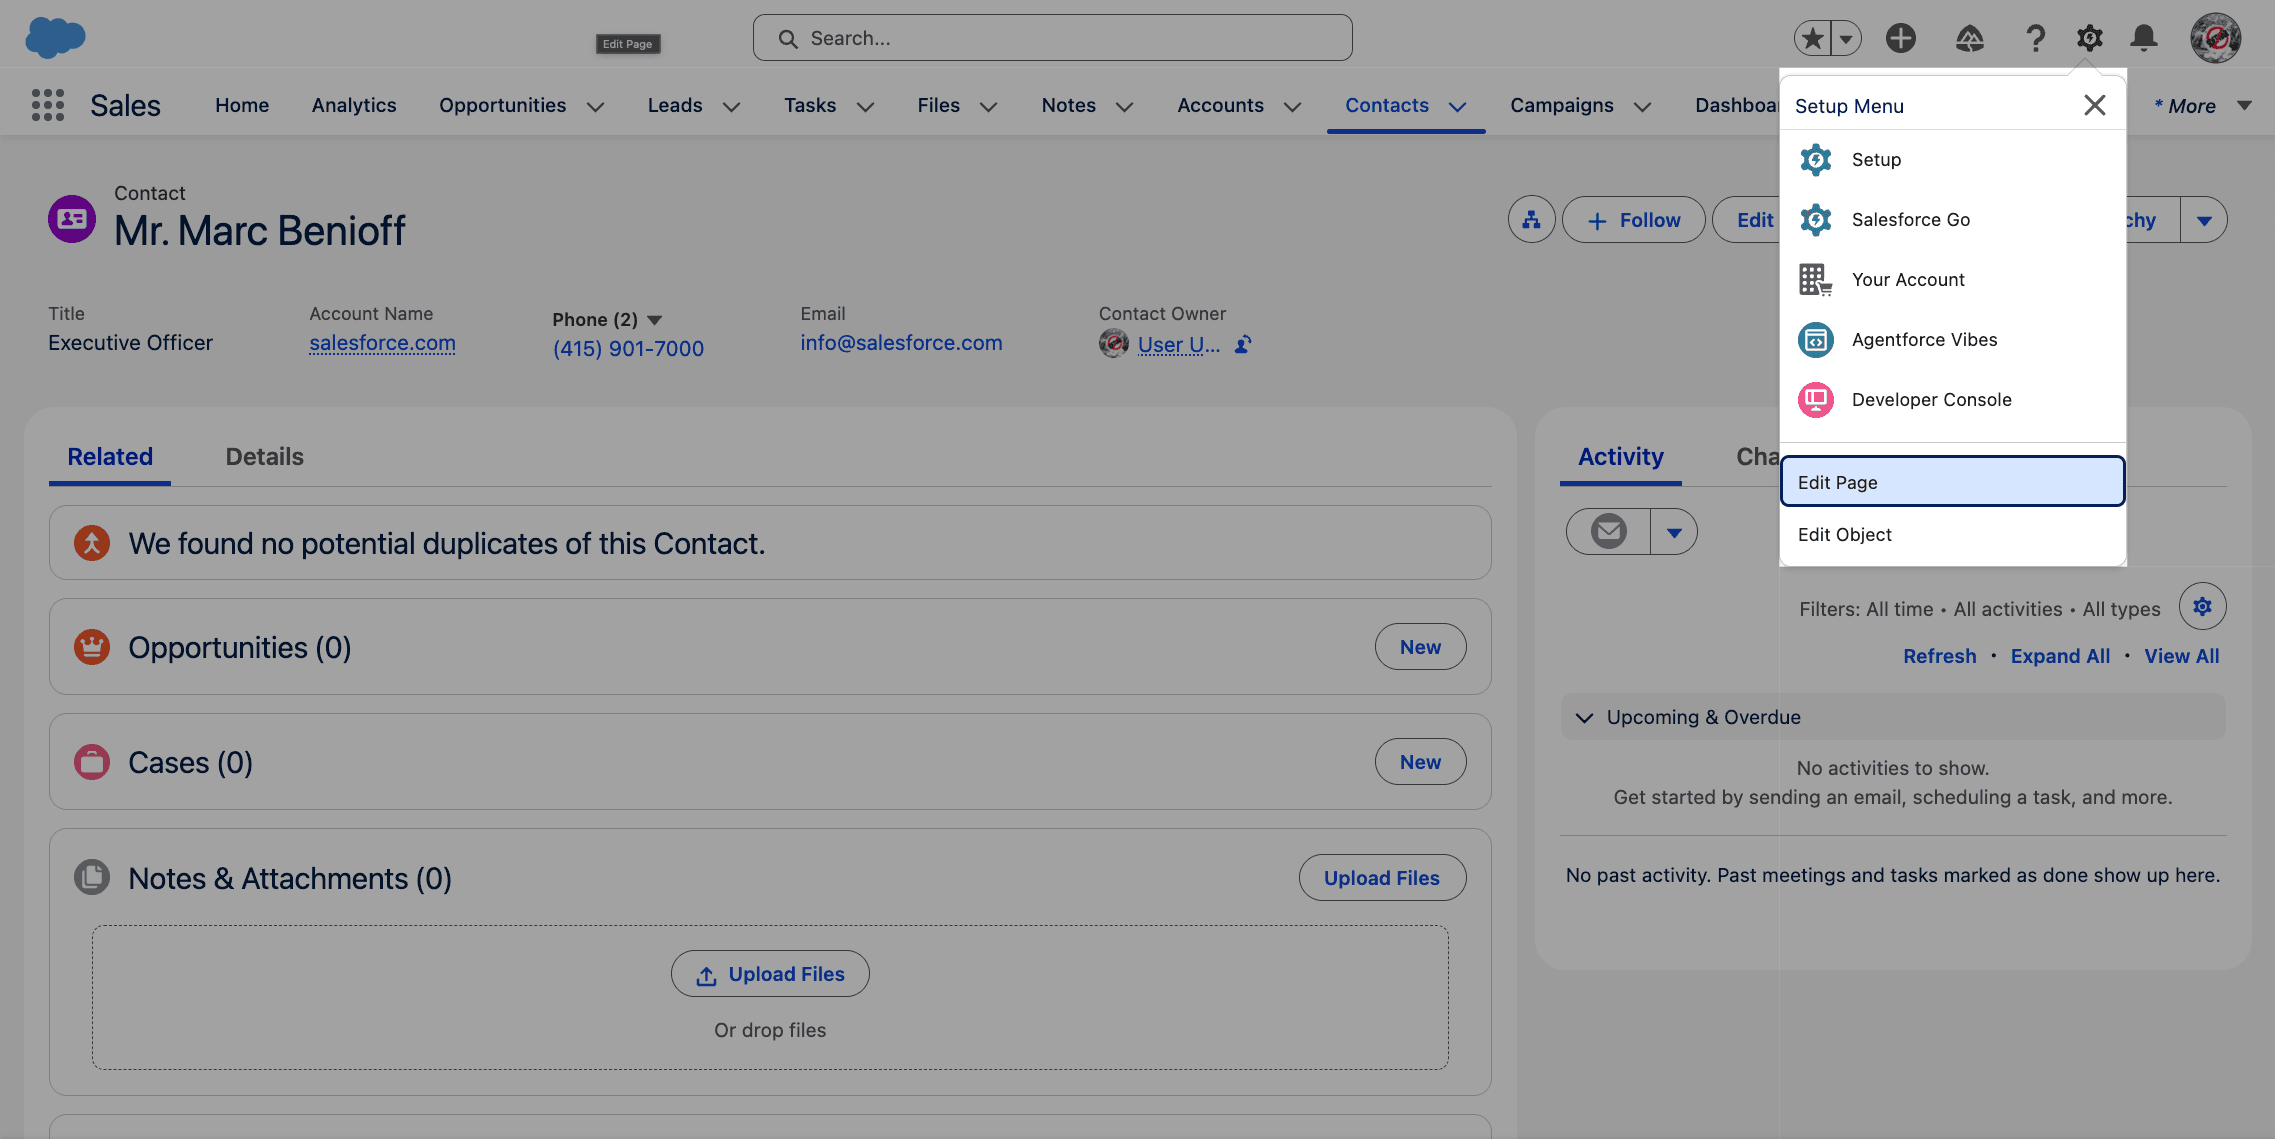
Edit the Contact, Lead, or Account Page
Go to a Contact, Lead, or Account (Person Account) page and click the Gear icon in the top right, and then Edit Page.
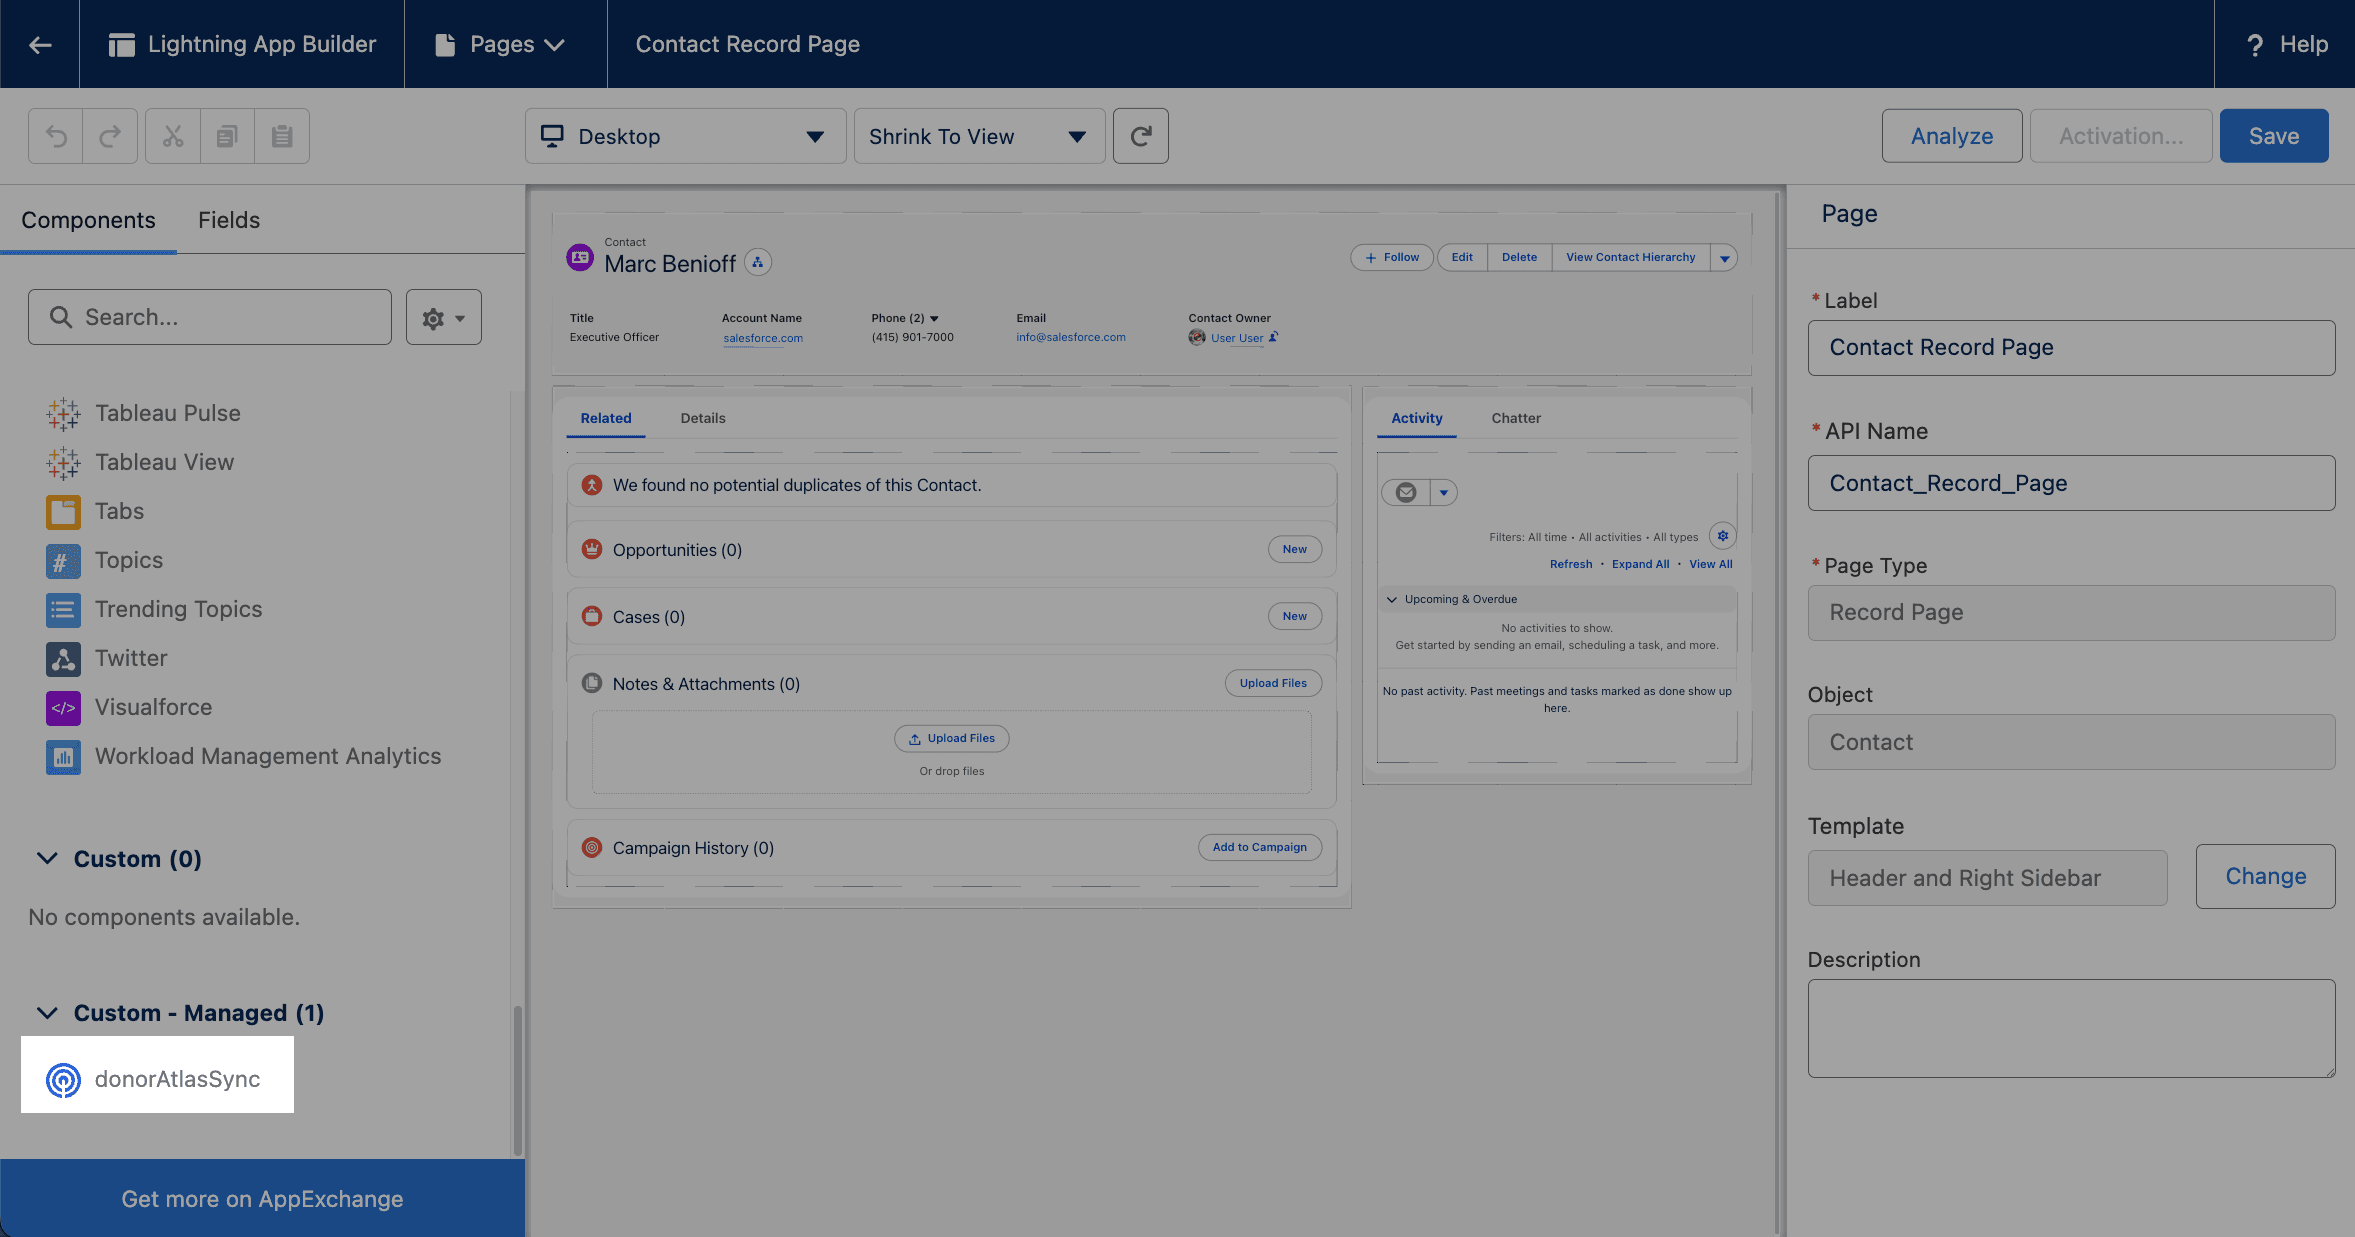
Find the DonorAtlas Component
On the left (under Components), scroll to the bottom until you see ![]() DonorAtlas Sync.
DonorAtlas Sync.
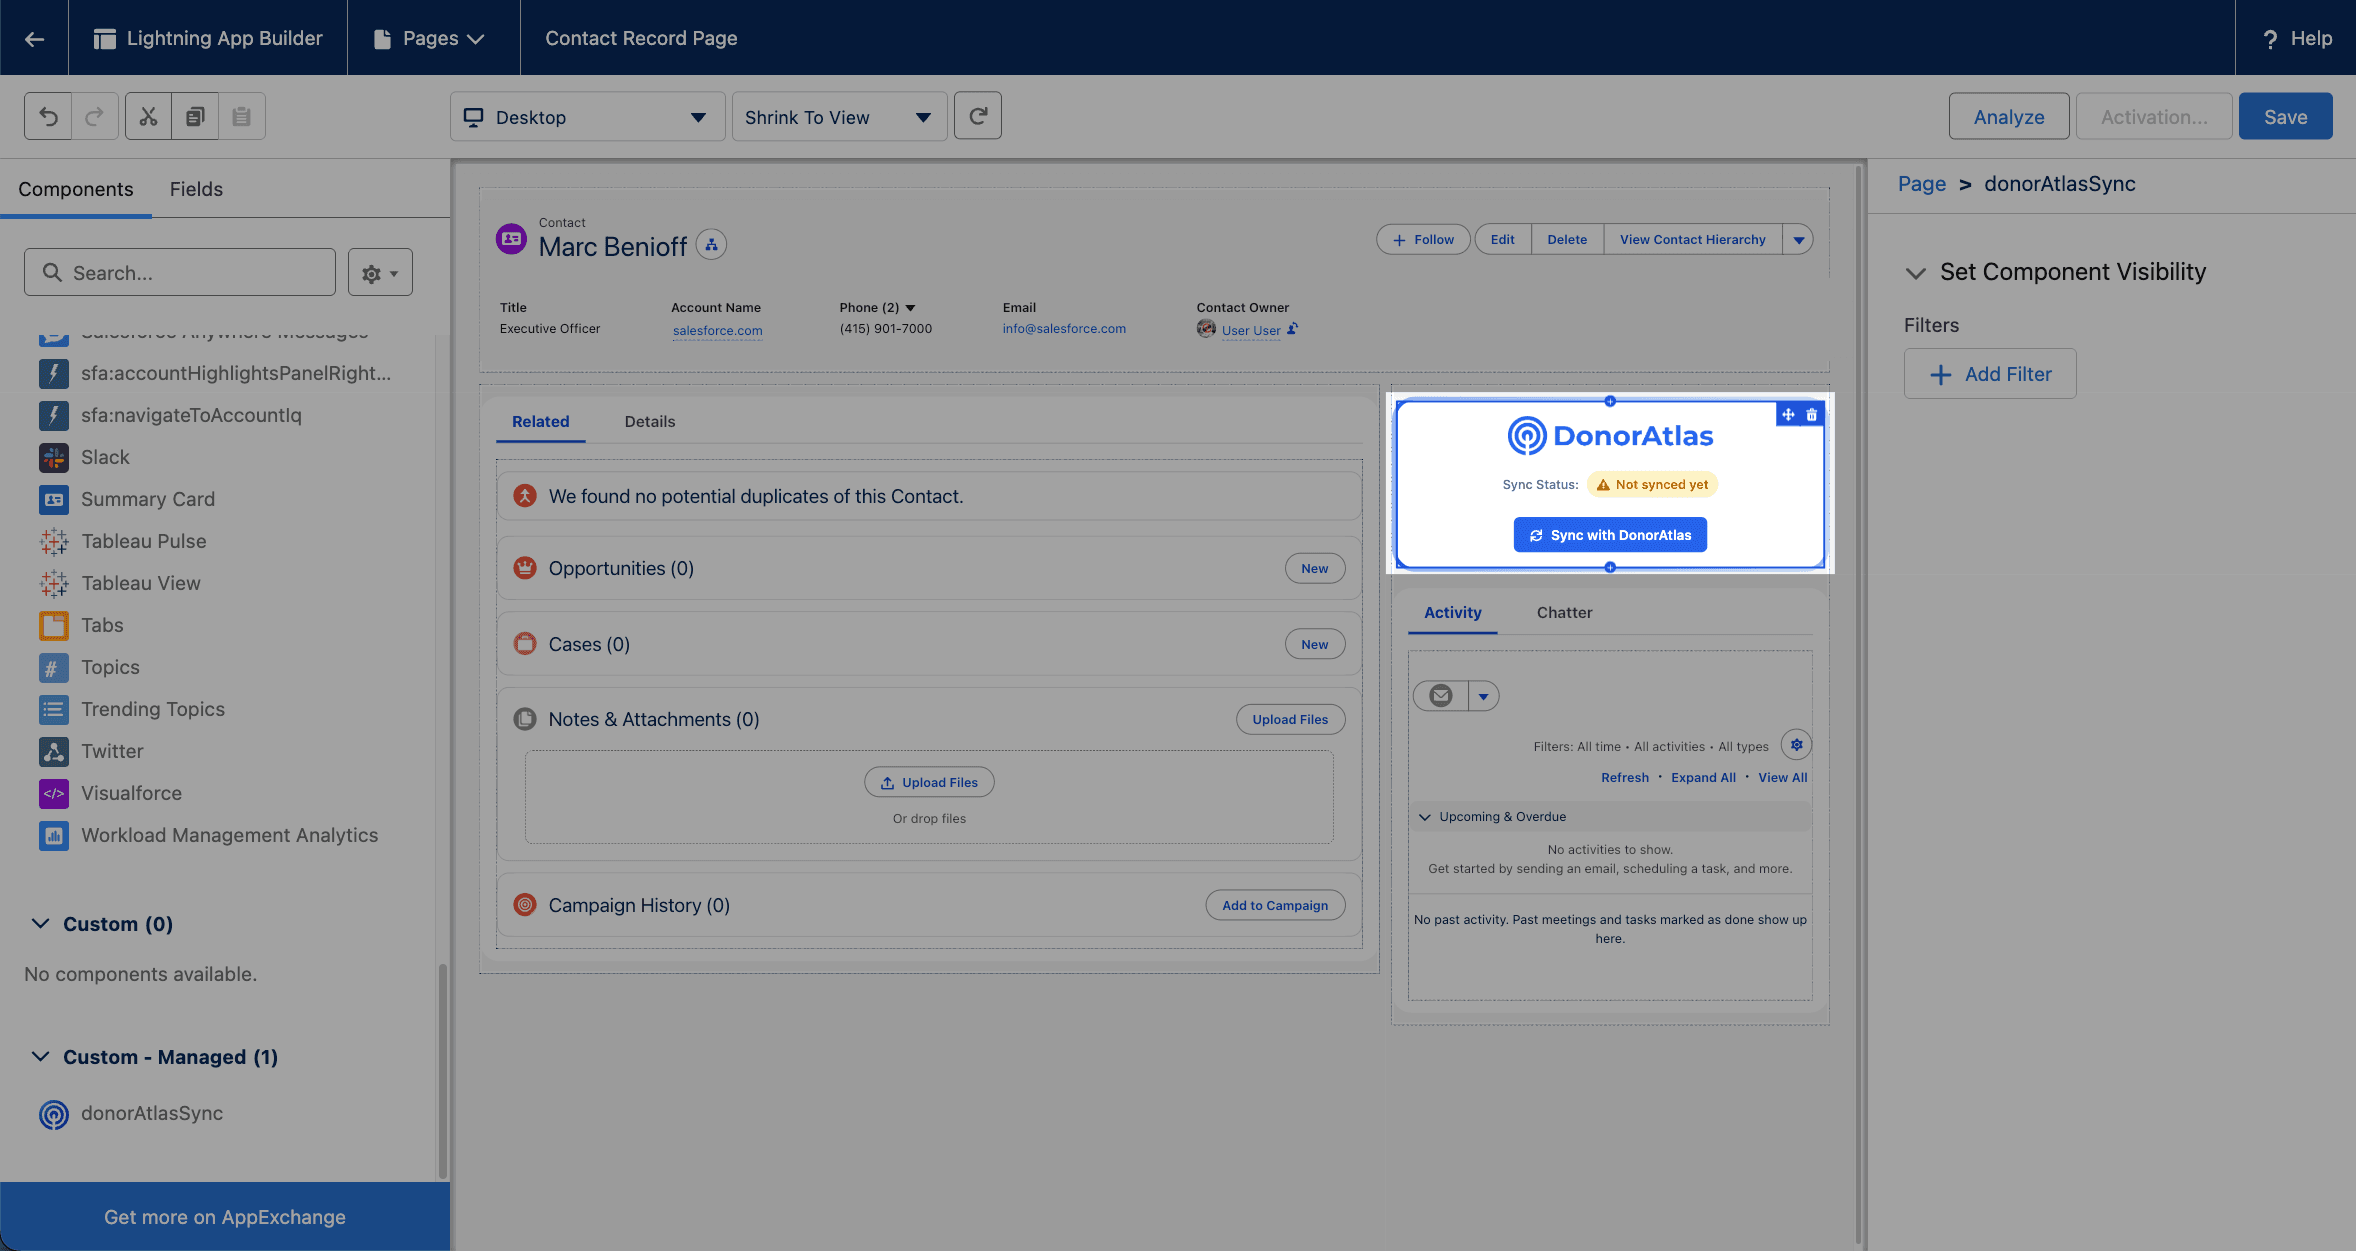
Place the Component
Drag the ![]() DonorAtlas Sync component onto the Contact, Lead, or Account page. We recommend placing it above the Activity box on the right. Click Save, and Activate the component.
DonorAtlas Sync component onto the Contact, Lead, or Account page. We recommend placing it above the Activity box on the right. Click Save, and Activate the component.
Activate the Donor Record Page
Navigate to any Donor record, click the Gear icon → Edit Page, then use the Pages dropdown at the top of the Lightning App Builder to open the Donor Record Page. Click Activation in the top right and activate it for the users you'd like.

Using the Integration
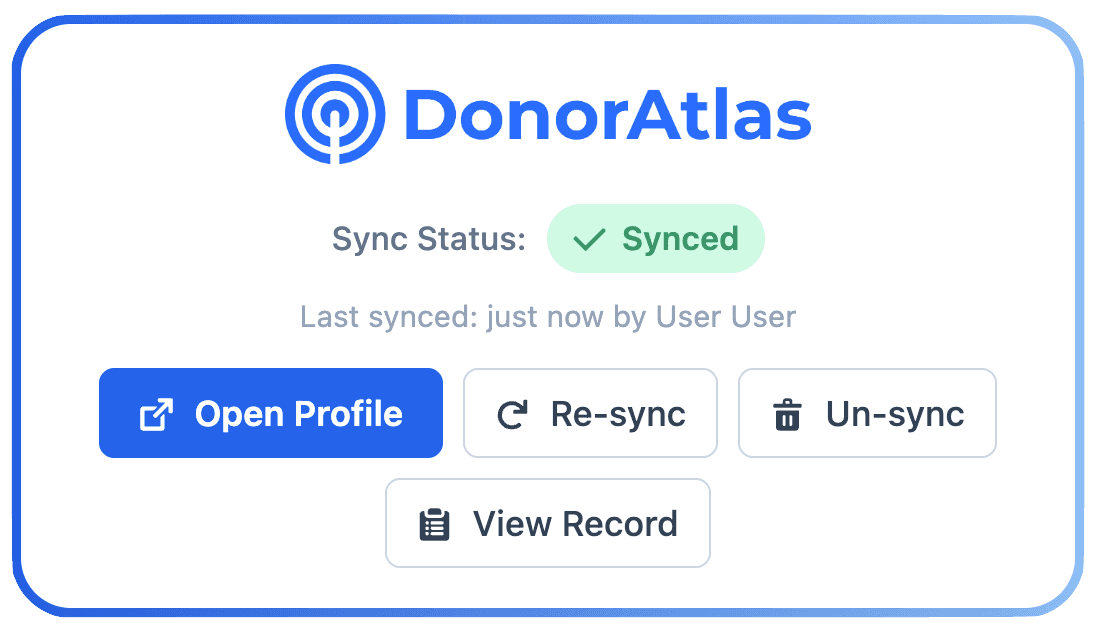
Sync Your First Record
Back on the Contact, Lead, or Account page, you'll now see the DonorAtlas component, which tells you whether this record has been synced with DonorAtlas. Click Sync with DonorAtlas to sync!
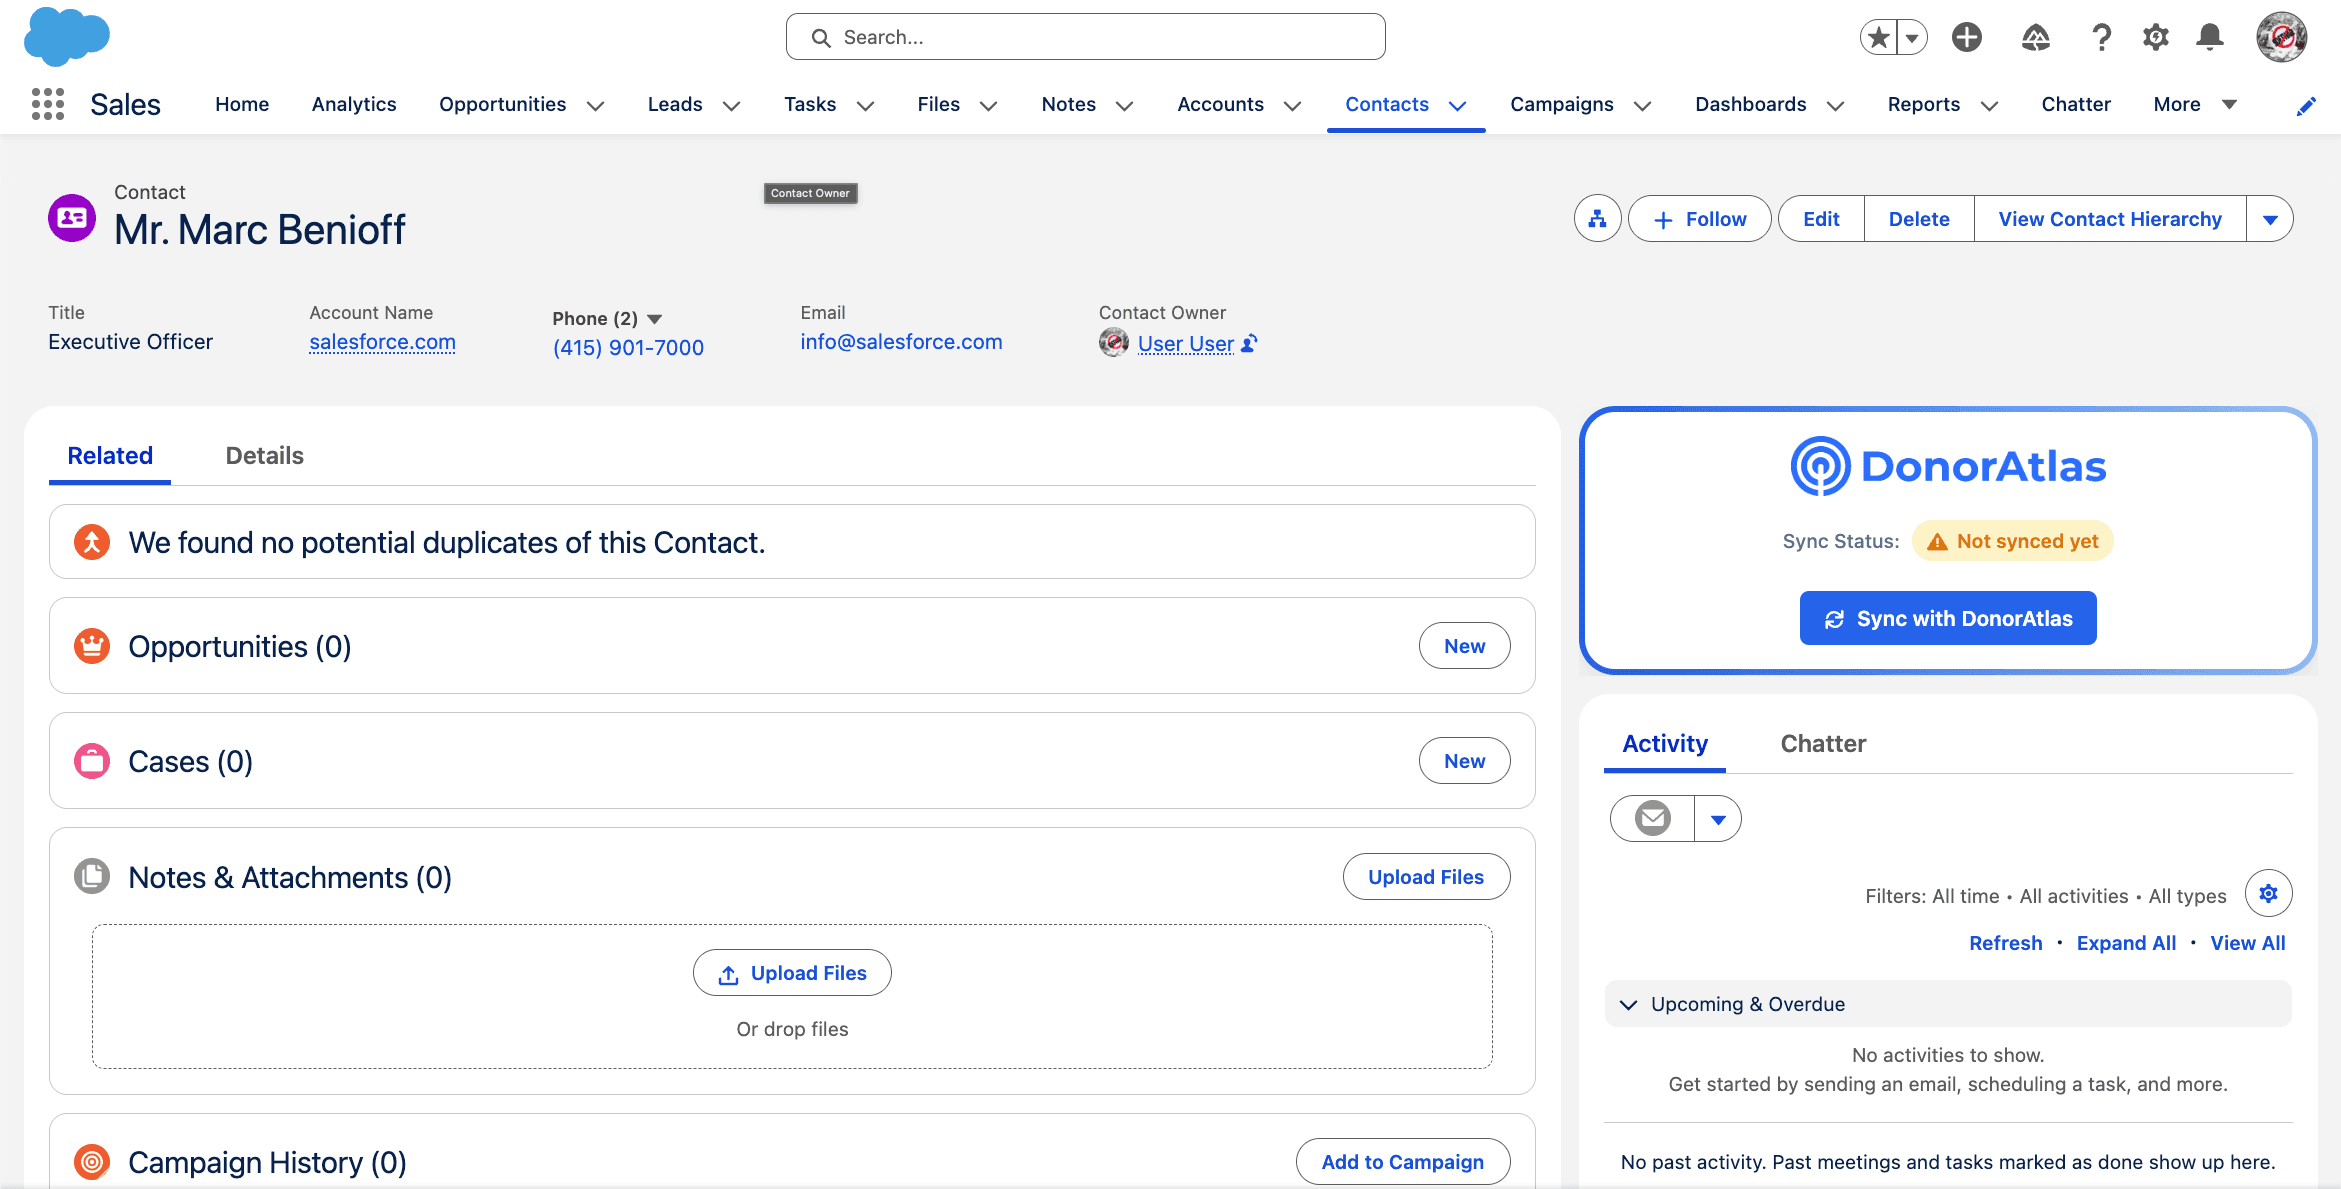
View Your Synced Record
The component will say “Pending” while it's loading. After a minute or so, the record will be synced! From here, you can open the DonorAtlas profile, re-sync the record (to update the information in Salesforce), un-sync (if DonorAtlas matched to the wrong donor), and view the underlying record in Salesforce.
Enable Batch Syncing
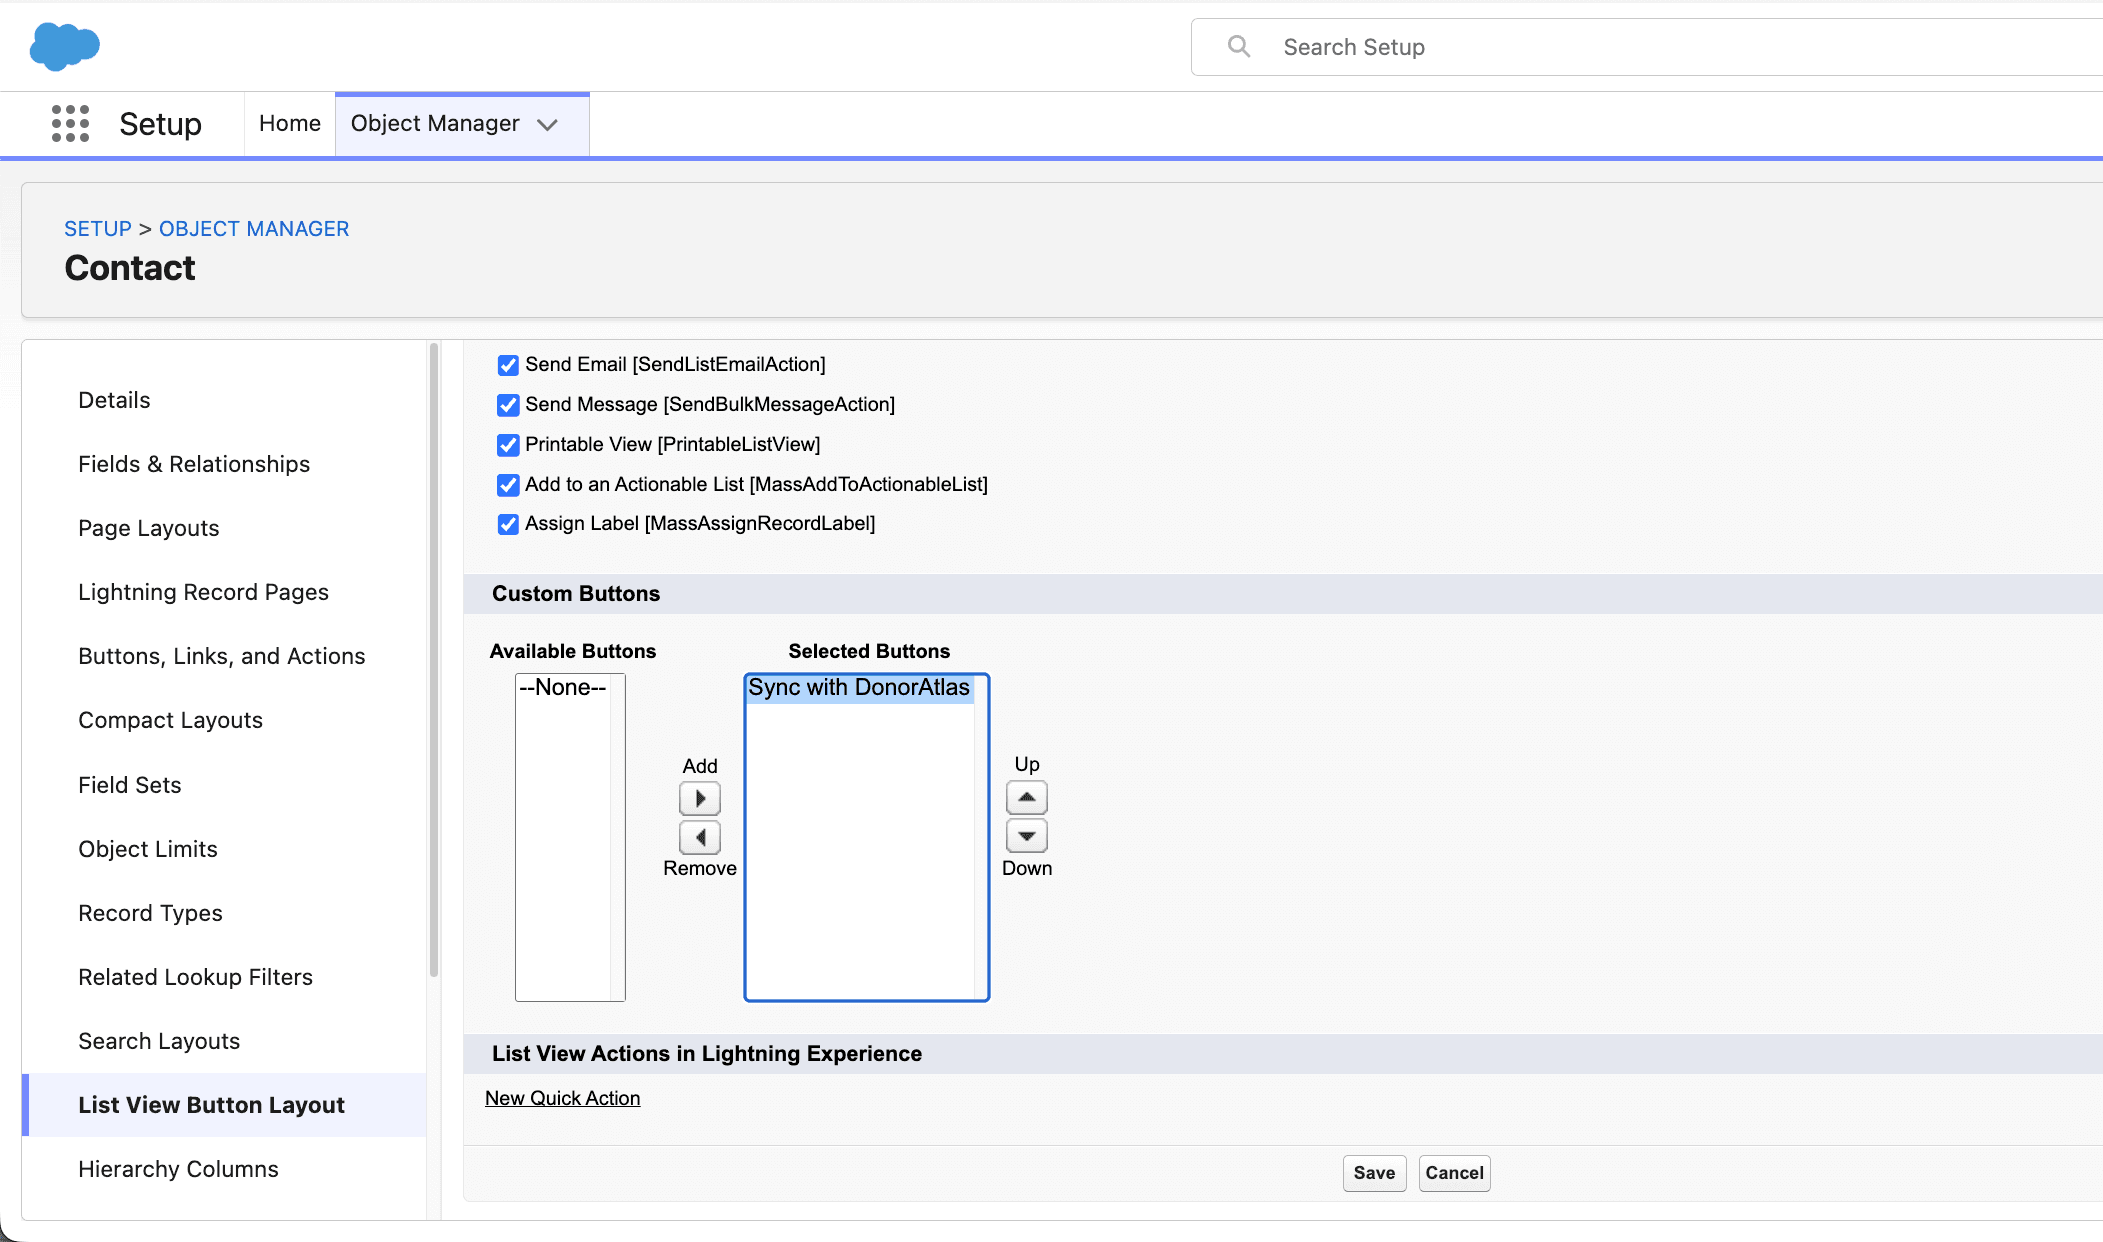
If you want to sync many Contacts, Leads, or Accounts at once, go to the Gear icon → Setup → Object Manager → Contact (or Lead, or Account) → List View Button Layout → Click the arrow on the “List View” row and click Edit → and under “Custom Buttons”, move “Sync with DonorAtlas” to the Selected Buttons.
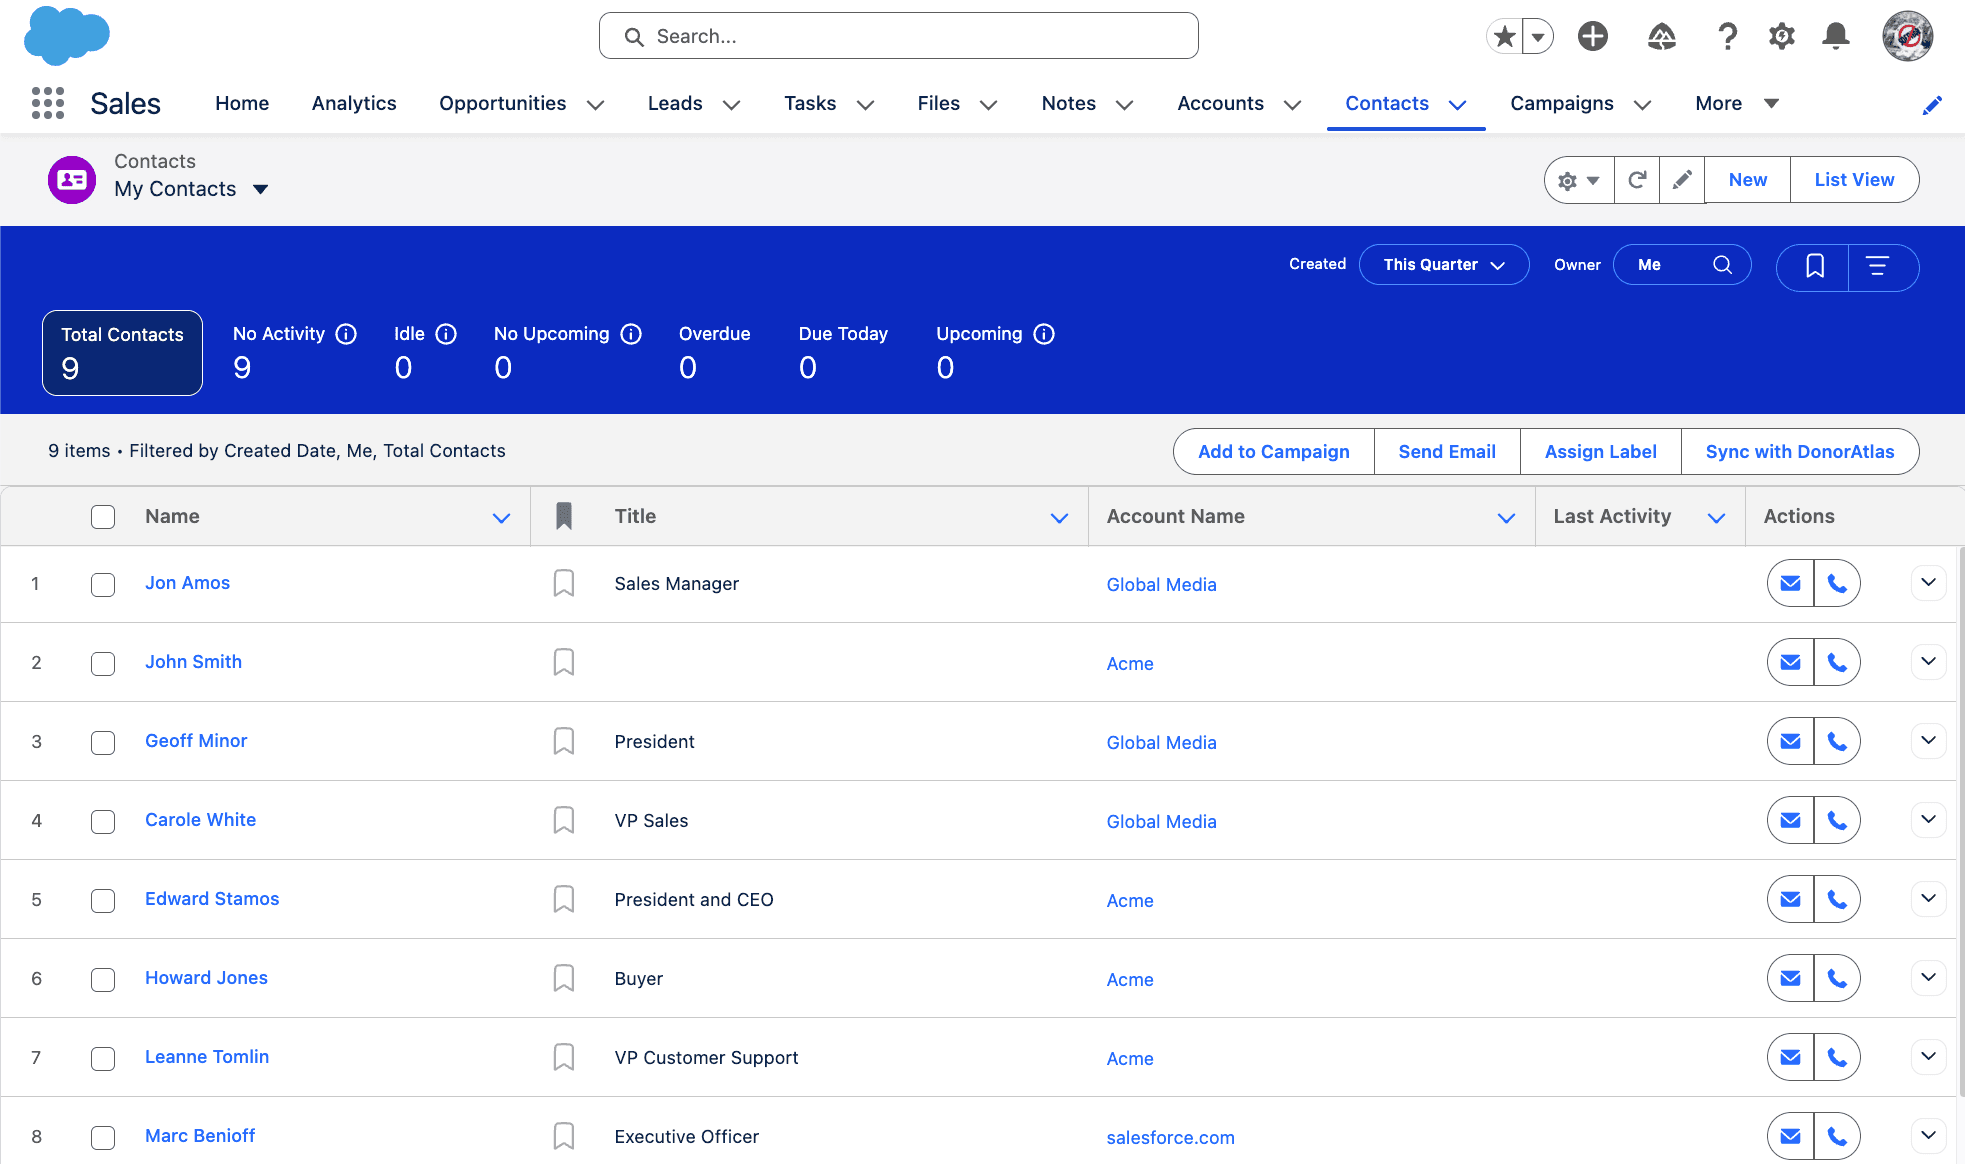
Sync Many Records at Once
Now, back on your Contacts list view, there is a new button called “Sync with DonorAtlas”. You can select many Contacts at once and click this to sync them all. Repeat for Leads and Accounts (Person Accounts) if you need.
Manage Your Integration in DonorAtlas
Back in DonorAtlas, notice the “Donors Synced with Salesforce” list in your team's Donor Lists, and the Salesforce integration listed under Team Details in your profile page (this is where admins can configure the integration).

We're Here to Help!
As always, don't hesitate to request support if you have any trouble installing or using the integration, or if you just have suggestions for how we should improve it! Request support right from DonorAtlas.
Ready to enhance your
Salesforce CRM?
Contact Us

Ready to enhance your
Salesforce CRM?
Contact Us